|
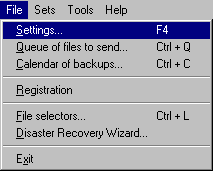
To open the Setting Menu select the Settings option from the File Menu.
Let's review the 7 screens in the Setting Panel
  1. Setting - General Screen 1. Setting - General Screen
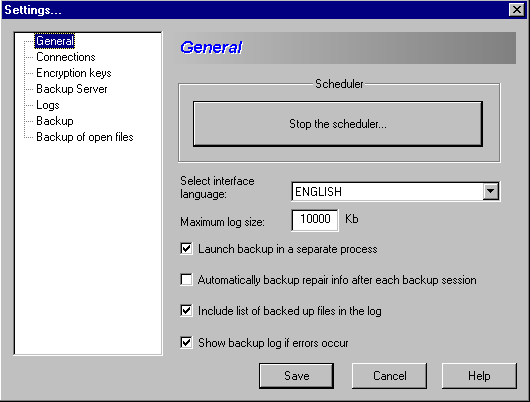
Scheduler - Activate or stop the scheduler that runs periodic backups.
Select interface language - Select language in the drop-down list.
Maximum log size - You can set the maximum size of a Backup Set's log file. When the size of a log file is exceeded, the log file will be renamed and archived. For example: If the log file path is C:\PROJECTS.ZIP", then the name of the main log file will always be "C:\PROJECTS.LOG" and the name of the archived/renamed log file will be "C:\PROJECTS.LOG.OLD".
Launch backup as a separate process - By default when you run a backup, the software starts a new thread within the application to manage the backup process for that backup set. Checking ON forces the program to start a separate version of the Backup Agent for each backup process. This option will consume additional system resources because multiple versions of the software could run at the same time.
Automatically back up repair information after each backup session - Check this box to always back up repair information.
Include list of backed up files in this log - Check this box to include a detailed list of all the files that were backed up.
Show backup log if error occursIf you check this box the log file will only be sent if there is an error in the backup process.
2. Setting - Connections Screen:
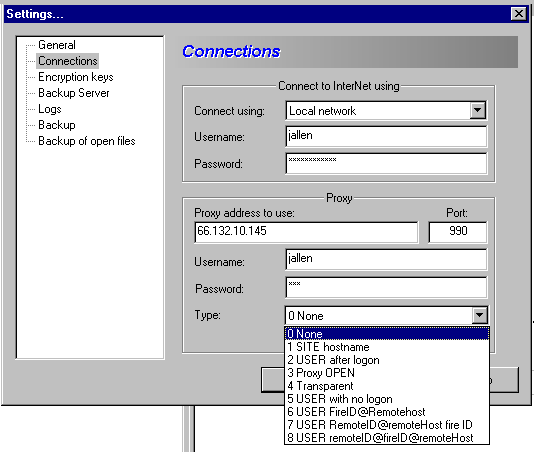
The software needs to connect to the backup server to transmit the backup sets. This Screen lets you set up your dial-up and proxy settings. There are basically two ways to establish a connection to the backup server:
Dial-up connection - Usually we use a "Dial-up connection" at home, or on the road. You have to select the name of your existing Windows dialup connection in the drop down box "Connect using" and enter your username and password. Double click on "My Computer", then "Dial-up Networking" to set up the dial-up parameters.
Local network - Usually we use a "Local network" in a company, or if you have a permanent connection to the Internet. Often companies use "proxy servers" to protect the local network from outside attacks. Contact your System Administrator to get information about your proxy servers.
3. Setting - Encryption keys Screen:
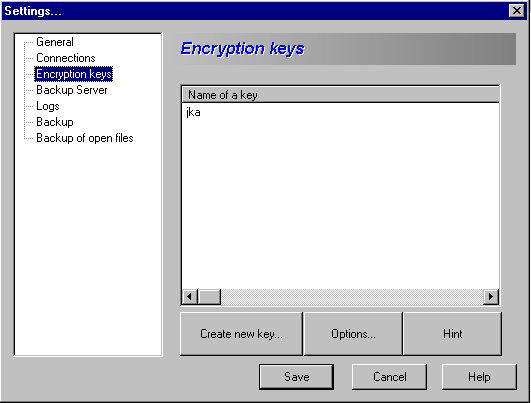
You can manage a single key or multiple encryption keys. These keys are used to encrypt backup archives and should be managed very carefully.
Generate a new encryption key - press "Create new key...".
Hint - shows the hint assigned to that key.
Options - allows you to print the 1024 bit code for a selected key, import a key or delete a key. You can only delete a key if all of the backup sets encrypted by that key have been deleted.
IMPORTANT NOTE: Be very careful with your encryption keys. If you lose your key/keys, you will NEVER be able to restore your files. That's why you MUST make several copies of each key, and store them in a few different safe places (away from your computer).
4. Setting - Backup Server Screen:
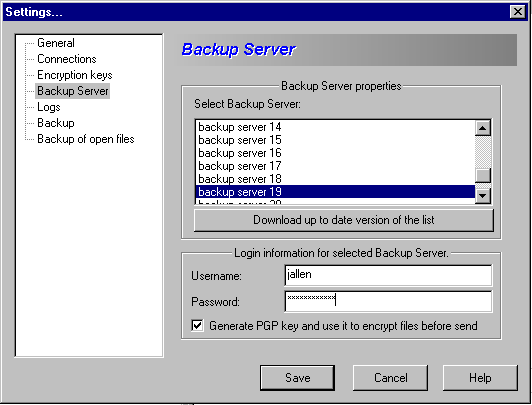
Use this Screen to select the appropriate backup server and to type in the log-in information for that server. Please contact support@gigaback.com if you need assistance with your server assignment or log-in information.
5. Setting - Logs Screen:
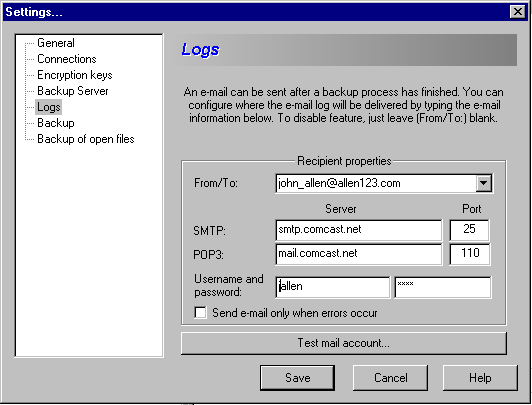
An email can be sent after a backup process has finished. You can configure where the email log will be delivered by typing the email information below. To disable the feature, just leave (From/To:) blank. You can insert more than one email address, but each one must be separated by a semicolon (;).
The software directly connects to a standard SMTP/POP3 server to send email messages. Enter the addresses and ports of your SMTP and POP3 servers, and the username and password to log-in to the POP3 account. Contact the system administrator of your SMTP/POP3 server to get the log-in information.
Note: You may need your POP3 account because some email servers (like Yahoo!) need POP3 authorization before sending email messages.
6. Settings - Backup Screen:
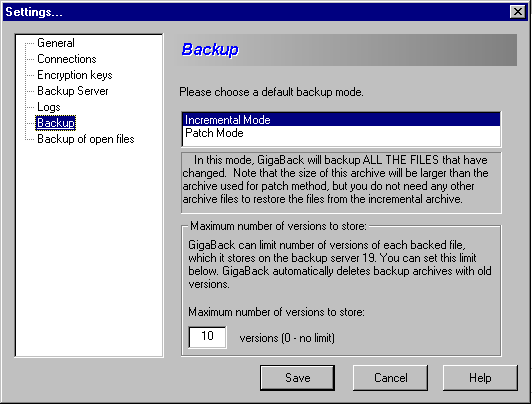
The software supports two distinct modes of incremental backup:
Normal mode - In this mode, the software backs up entire new or changed files, no matter how small the changes may be.
Patch mode - If you use the patch mode, the software finds the binary changes within your files and only backs up the binary changes, not the whole file. It takes much less storage space, but you need all the backup archives to restore.
Maximum Version stored on Backup Server (Normal Mode only)- When backing up to our secure backup server, you can limit a number of stored versions of a backed up file. The software automatically deletes the oldest version. If you set the maximum version to "0", there will be no limit and all full backup sets will be saved. Please note that using the "0" option will consume large amounts of storage space and result in an increased storage cost. The maximum version default is 10 versions. Meaning that there will be 10 copies of your backup sets stored on the backup server - the oldest copies will be deleted as new copies of that backup set are created.
7. Setting - Backup of opened files Screen:
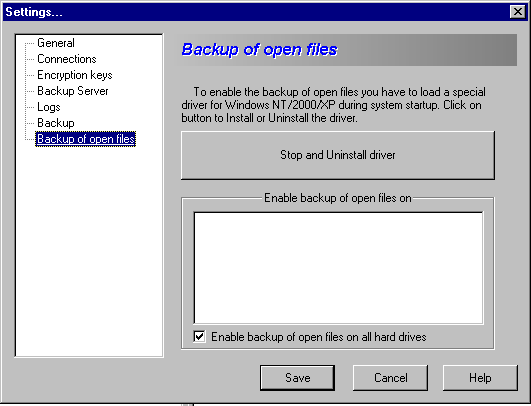
To back up opened files you have to install a special Windows kernel driver. This Screen allows you to install and uninstall this driver. You have to reboot to apply changes. Open file option only works for Windows NT/2000/XP.
|


